
Before you start cutting picture frame patterns, you must learn the Basics of a scroll saw. This article will guide you through how to use your scroll saw to cut patterns. This article will also discuss how to make picture frame using scroll saw pattern. If you haven't yet owned a scroll saw, you'll want to purchase one before you start cutting. Make sure the scroll saw you are buying is the right size.
Basics of a scroll-saw
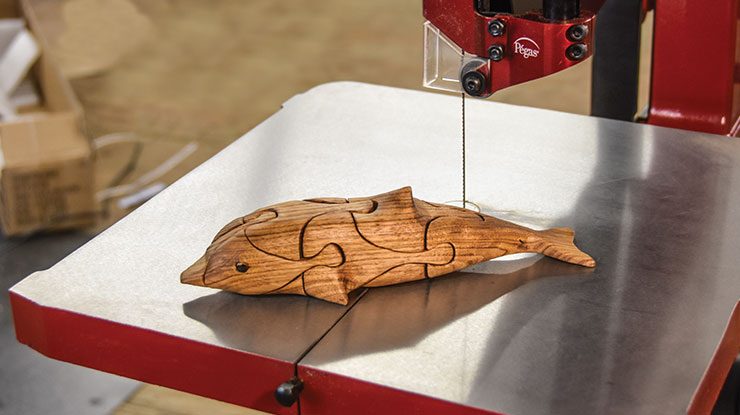
Scroll saws are a wonderful tool for creating beautiful wooden frames and picture holders. There are two types of scroll saw projects. They can be used to make wall hangings or flat, tabletop displays. Both of these types of projects will require you to cut multiple pieces from wood with different sizes. To make a 3D Scroll Saw Pattern, you need multiple layers.
Before you begin cutting you will need to find the scroll saw pattern that's right for you. You can find thousands upon thousands of free patterns online. Many patterns are appropriate for beginners. Others are more difficult. Many of these patterns can be followed easily and you will find the right one. Once you've created your frame, you'll want to finish it with wood varnish or lemon oil to protect the surface from damage.
A self-contained puzzle of Noah's Ark is another easy scroll saw project. This pattern can be printed, making it a great way to practice your skills. There are many printable patterns that can be used for this project. A freestanding VW Beetle puzzle is another option if you don't feel comfortable with scroll saws. It's not only decorative; it's also great for mental training! If you're looking for a project that won't take you a lot of time, look no further than a DIY tutorial or a professional scroll saw pattern.
Basics of cutting patterns with a scroll saw
If you are considering making your own wooden frames, it is worth learning how to use a scroll saw to cut the patterns. Patrick Spielman's book contains many new patterns that you can attempt. Unlike other books on the subject, this one contains more than thirty patterns, and each of them uses a different scrolling technique. You will learn how to size, copy and transfer patterns.

When you are familiar with the scroll saw, creating picture frame designs is simple. Many of the most popular picture frame patterns use this technique. This method makes it easier to cut the pieces precisely because they nest together. You can double bevel by tilting the table while you work. This kind of marquetry can also be called "artistic hardwoodworking" and is great for those just beginning the craft.
You can purchase a scroll saw online for under $40. Scroll saws that are only a few years old are often in excellent condition. A scroll saw can be purchased online for a low price and enables you to learn how to make picture frames. There are many websites that sell used scroll saws. These websites have a variety of models and prices for those who aren't on a tight budget.
How to make picture frames using a scrollsaw
Making picture frames with a scroll saw can be challenging and requires an extensive knowledge of the tool. The book covers basic scrolling techniques, and gives examples of different styles. Despite the name, all picture frames consist of two main boards: a main board with a frame opening and a smaller face frame glued on top of it to hold the picture. Despite the complexity of these steps, the book is an excellent guide for beginners.
This book contains many project ideas for beginners to the scroll saw. This book contains 32 designs that can all be made with the scrollsaw. Each frame design can be customized in many ways. Since no two picture frames are exactly alike, the book is more than just a pattern book. Listed below are some of the techniques that can be used. Once you're familiar with these scrolling techniques, you can experiment to find the perfect one for your picture frames project.
FAQ
What kinds of woods are good for making furniture?
Woods are classified by their hardness. Softwoods include cedar and pine as well as cedar and cedar. Because they are resistant, they can be used for outdoor furniture. The hardwoods include teak, maple, mahogany and oak. Because they are not weather-resistant, they are best used indoors.
Do you have any suggestions for starting a woodworking shop?
It is hard work to start a woodworking company. But if you're passionate about your hobby, you won't mind putting in the effort. Plus, you'll probably enjoy the challenge of running your own business.
One thing to keep in mind when launching a new venture is that you might encounter unexpected problems along the way. You might run out money, or you may have to borrow unexpectedly. Or maybe you'll find that customers aren't willing to pay as much as you'd hoped. You need to be ready for these situations if you want to survive.
One tip is to have a separate banking account for your company. You'll know exactly how much money is coming in by setting up a separate bank account.
What is the average time it takes to finish furniture?
It all depends on what type of wood you use, how complex your design is, and how much finishing you use. Hardwoods, for example, require more maintenance than softwoods. Hardwoods are also more expensive than softwoods. They last longer and are more resistant to moisture. It takes between one and three months to finish a piece.
How much money do you need to get going?
There are no exact numbers because every project is different. These factors will help you get an estimate of how much money is needed.
-
Material costs
-
Tools and equipment
-
Time spent on the project
-
Hourly rate
-
How much profit do you expect to earn
-
You can hire help, regardless of whether you have a plan.
You might start small if you are just starting out. As you gain more experience, you will be able tackle more complicated projects.
How do I determine what kind of wood my project is made from?
Always check the label before purchasing wood. The label should include information about the wood species and its moisture content as well as whether or not it has been treated using preservatives.
Statistics
- Overall employment of woodworkers is projected to grow 8 percent from 2020 to 2030, about as fast as the average for all occupations. (bls.gov)
- If your lumber isn't as dry as you would like when you purchase it (over 22% in Glen Huey's opinion…probably over 10-15% in my opinion), then it's a good idea to let it acclimate to your workshop for a couple of weeks. (woodandshop.com)
- Woodworkers on the lower end of that spectrum, the bottom 10% to be exact, make roughly $24,000 a year, while the top 10% makes $108,000. (zippia.com)
- Average lumber prices rose about 600 percent between April 2020 and May 2021. (familyhandyman.com)
External Links
How To
How to stain hardwood
Staining wood can be described as a process where chemicals are applied to the wood surface. This causes the wood to take on a new color. This chemical reaction causes the wood color to change from white and brownish red. Oak is the most commonly used wood for staining, but other woods can also be stained.
There are many methods to apply stain to wood surfaces. You can mix the stain with a solvent, such as turpentine, and spray it onto the wood. Another method involves applying a solution of water to the wood. Stains can also be mixed into paints and varnishes, becoming part of the finish coating.
Preparing the surface is the most important step in staining wooden surfaces. To apply the stain, clean the wood completely. Sanding smoothens any scratches or rough spots. The next step is to choose the stain type you want. There are two main types of stain: non-penetrating and penetrating. Penetrating stain penetrates deeper into wood than nonpenetrating, making them suitable for dark colors like mahogany. The best non-penetrating colors are those that work with light colors like maple.
After choosing the type and application method you prefer, gather your tools. Paintbrushes are great for applying stain because they allow you to evenly spread the liquid across the surface. You should also have some handy rags to wipe up excess stains after you finish painting. If you are planning to mix your stain, ensure you have enough containers for each component.
Once you have prepared all your materials, it is time to clean the areas where you will stain the wood. To remove dirt and dust, use warm water and soap. Wipe down all furniture pieces with a dampened cloth and clean water. If you intend to stain darker wood, make sure you get rid of any debris.
Apply the stain. Start at one end of the piece of furniture and brush or spray the stain onto the wood. You should work slowly and carefully. Continue moving along the grain until you reach your opposite end. Make sure that the stain does not drip off the edge of the wood. Allow the stain to dry completely before you move on to the next step.
To protect the painted surface, apply a coat of clear polyurethane sealant. Apply three coats of polyurethane sealer. Let the third coat dry overnight before you sand the final coat.