
Do you feel bored of the usual scrolling patterns? Try these new scrolling strategies if this is you! These tips can make scrolling more fun and relax! Here are some of our most loved scrolling patterns: Stars and Geometric plane patterns. These techniques can be used for any website or smartphone that you are stuck on. The results are bound to please!
Infinite scrolling
Infinite scrolling is a negative effect on the user experience. First, it makes bookmarking difficult. If a user leaves the website, and then returns, it makes it difficult to bookmark a location. Users will also feel annoyed by their inability to find their exact location. This can negatively impact the overall user experience. This can be avoided by designing a solution that removes footers.
Infinite swiping is a user interface issue that affects both mobile and the web. Users form expectations and habits that are tied to their experience on a site. A good solution is to make your content visible to all users, but also to give users the option to manually load more content if they'd like. This is especially important when using mobile devices, which can make it easy for users to lose track how far they've come.
Parallax effect
Parallax effects are a very popular design technique. It creates an illusion that depth is present, which can increase visitor interest and improve their time on site. Parallax scrolling does not have to be horizontal. You can also highlight certain areas with diagonal parallax effects. Make sure you balance this effect with lots of blank spaces. While it is fun to create, be careful not to go too far!
Parallax scrolling can be used in web design to add an extra dimension to the overall story. Parallax scrolling allows a website selling fresh fruits and veggies to emphasize the difference in speed. Clicking on an image on the screen that is not static can allow users to view product development and images before and after. This effect is particularly effective if you want to give users the feeling that they have control over the story.
Geometric plane patterns
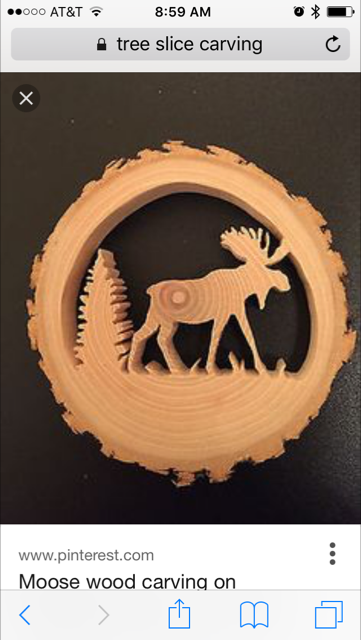
Remember to include both positive and negative spaces when creating scrolling patterns. Negative spaces refer to wood pieces that have been removed while positive spaces refer to those that are left intact. It is important to create a geometric plane design by bridging between negative and positive space. Geometric plane patterns use standard geometric forms to define feather groups, body parts, and other distinct areas.
You can spice up your images with geometric patterns if you are looking for something creative and fun. These patterns can be used as mascots. Apps can combine several images to make a fun and unique experience. Geometric patterns make images stand out and add an extra layer of personality. Highlights and shadows are great tools for drawing attention to certain parts of your images.
Stars
Star is the first pattern that you should attempt. This is a very simple pattern that's easy to follow. It's a great way to start learning basic curve cuts and moving on to patterns. This is an excellent way to recycle scrap wood. Knowledge of Axminster has a free printable template to help you make this pattern. This page also has links to other scrollsaw patterns, including a template that draws Christmas stars.
FAQ
How can you calculate the woodworking price?
It is crucial to keep project costs as low-cost as possible. Always ensure you are getting the best possible price for materials. It is important to take into consideration all factors that can impact the cost of your projects. These include time, skill and experience. You can find an estimate of the cost of different woodwork projects in our guide to common DIY tasks.
How can I keep my shop organized?
To keep your workshop tidy and organized, you should first create a place for tools storage. Make sure your tools are clean and free of debris and dust so they can be used properly. Pegboard hooks can be used to hang tools and accessories.
Where do I get my woodworking supplies?
There are many places you can get everything you need, and you don't have to go far. For example, you could visit local hardware stores or look online at websites like Amazon.com.
For furniture and other materials that you can reuse, check out flea markets and garage sales.
How can I determine which tools are most suitable for me?
It helps to reflect on your needs and preferences before you shop for tools. What do you prefer: metal or plastic handles? What size screws and nails do you use most often? Would you rather use hand tools than power tools?
How often should new supplies be purchased?
You'll probably have to replace some of your tools over time. Hand tools will need to be sharpened regularly. You'll also need to replace parts if you use power tools. Try spreading your purchases over a few months so you don't buy too many at once.
Do you have any other information I should know about woodworking and/or the process of making it?
It is easy to underestimate the amount work involved with furniture construction. The hardest part of the process is actually finding the right wood. There are so many varieties of wood available that choosing one can be difficult.
Another problem is that not all wood has uniform properties. Some woods will warp over time, others will split or crack. Before purchasing wood, you should consider these factors.
Statistics
- Most woodworkers agree that lumber moisture needs to be under 10% for building furniture. (woodandshop.com)
- In 2014, there were just over 237,000 jobs for all woodworkers, with other wood product manufacturing employing 23 percent; wood kitchen cabinets and countertop manufacturing employing 21 percent. (theartcareerproject.com)
- The best-paid 10 percent make $76,000, while the lowest-paid 10 percent make $34,000. (zippia.com)
- If your lumber isn't as dry as you would like when you purchase it (over 22% in Glen Huey's opinion…probably over 10-15% in my opinion), then it's a good idea to let it acclimate to your workshop for a couple of weeks. (woodandshop.com)
External Links
How To
How to stain hardwood
Staining wood can be described as a process where chemicals are applied to the wood surface. This causes the wood to take on a new color. The wood will turn from white to brownish-red due to the chemical reaction. The most common type of wood used for staining is oak, although many other types of wood can be stained.
There are several ways to apply stains to wood surfaces. Some methods involve mixing the stain with a solvent (such as turpentine) and then brushing or spraying the mixture onto the wood. You can also apply a solution containing water and dye directly to the wooden surface. Stains can also be mixed into paints and varnishes, becoming part of the finish coating.
Preparing your wood for staining is the first thing to do. The wood must be thoroughly cleaned to remove all grease and dirt. Sanding the wood removes scratches and imperfections. The next step is to choose the stain type you want. There are two basic kinds of stains: penetrating stains and non-penetrating stains. Penetrating and non-penetrating wood stains penetrate deeper than other types, making them perfect for dark colors like mahogany. Light colors such as maple work well with non-penetrating stain.
Once you have decided on the stain type that you want, get your tools ready. You can use a paintbrush to apply stains. This allows you spread the liquid evenly over the surface. You should also have some handy rags to wipe up excess stains after you finish painting. You should have enough containers to store the various components of the stain mixture if you intend to mix it yourself.
After you have prepared your materials for staining, clean the area. Use soap and warm water to remove dust and grime. Wipe the entire piece of furniture with a rag dampened with clean water. Be sure to get rid of all loose material, especially if staining is planned for darker wood.
The stain should be applied next. Next, apply the stain to the furniture by starting at one end. Work slowly and carefully, moving back and forth along the grain of the wood until you reach the opposite end. Make sure that the stain does not drip off the edge of the wood. Before moving on to the next steps, allow the stain drying completely.
Apply a clear polyurethane sealant to protect the painted surface. Apply three coats with polyurethane. Let the third coat dry overnight before you sand the final coat.