If you'd like to add color to your wood carvings, you should consider using watercolor paint. The paint absorbs into the wood, showing the wood grain. There are two options for watercolor paint: cakes or tubes. The cakes are thicker so they are less likely to drip. Remember that water-based paintings can be damaged by dust or wood shavings. If you have a lot of time on your hands, try applying a thin layer of primer before painting.
Oil-based oils
Oil-based oil paints can be used for painting wood carvings. Oil-based paints can be used on certain wood types, such as maple or birch. If you are painting a kitchen tool, oil-based paints may not be the best choice. There are some other advantages of oil-based paints for wood carvings.
Watercolors
Watercolour painting wood with watercolour paints is a great way to express yourself creatively while keeping the wood's integrity. Watercolors can be used on wood without warping. These colors do require some prep work. Sandpaper is an effective tool. However, for the center section in your wood carving, you will need to use fine grit. By doing this, watercolor pigments will shine through the wood and appear framed. Wear protective eyewear and use a dust removal kit to protect your eyes.
Gesso
Preparing the piece is necessary before you can paint your wood carvings. You can use either the artist grade or student grade gesso. The artist grade is thicker and the student grade is white. Acrylic paint can be added to more pigmented colors. Combine gesso and painting to get the desired color. Once the gesso dries, apply several thin coats (or more) of paint.
Acrylic paints
Acrylic paints make beautiful woodcarving projects. Acrylic paints stick to various types of wood and are non-toxic. Plus, they're non-toxic. They are ACMI certified, making it ideal for people with sensitive skin. Here are some tips for choosing acrylic paints for painting woodcarvings:
Oil-based paints mixed in gesso
Gesso can be described as a mix of animal glues and whiting. It is typically white, but you can find it in black, colored, and even transparent varieties. The type of gesso you choose will determine the consistency. Some brands will apply quickly, while some will leave a toothy look. Try different types until your preference is found. Liquitex Super Heavy Gesso makes it easy to create sculptural effects onto a canvas. Use a palette knife to apply it.
Basswood panel
Prior to applying paint to your basswood panel, seal it first. Wood's natural substances can lead to paint deterioration. Sealers keep the wood's surface smooth and uniform so that paint doesn't penetrate the wood pores. A properly sealed wood will ensure a more durable finish. Here are some ways to protect your basswood panel. The right sealer is needed for your basswood panels.
Sealing coats
Follow all instructions when using a sealer for wood carvings. Use a paintbrush and apply the sealer thinly to the entire sculpture. Let the sealer dry completely in an open area before applying the next coat. Sand the carving lightly once the sealer is dry. This step is not necessary if you have a very delicate carving.
Using gesso
Apply gesso to the back and front surfaces of your wood carving before you begin painting. This material is typically thinner than student grade gesso and will absorb more paint. You can mix it in with acrylic paint, but this is not recommended. The amount of paint that you intend to use will determine the thickness of your gesso.
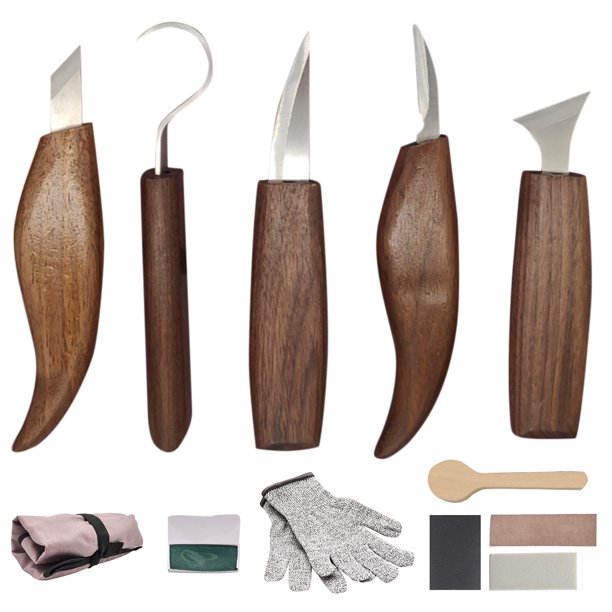
How to choose a wood
Choosing the right wood for painting wood carvings is important, as paint can affect the physical dimensions of the piece. It is best to choose a light wood that is neutral in color. This will allow you paint over darker tones, and highlight those with more contrast. You can always paint the wood with a darker shade if it is too dark. You can paint whole pieces of wood or parts of it.
Pre-treatments
Many wood carvings can be painted or colored. These works need to be treated before water, oils, and other paints can seep through. This is especially true for softwoods such as basswood which are extremely absorbent. You can paint wood carvings with a special wood-based painting, but you should follow some guidelines to avoid any problems. This article will describe how to pretreat wood.
FAQ
Can I refinish my own furniture?
Yes! There are many options for refinishing furniture that you don't need to hire a professional. Here are some ideas:
Use sandpaper for removing stains and scratches. Then wipe down the surface with a clean cloth.
Apply clear polyurethane paint. Allow to dry thoroughly before moving furniture.
Use acrylic paint to paint furniture.
Instead of using paint, stain is a better choice. Furniture will look richer with the stain.
Use shellac wax. You can protect your wood with wax and give it shine.
How do I learn basic woodworking skills?
Building a bench is a great way to get started in furniture building. You can do this project using any type of wood you have on hand at home. If you're not sure which kind of wood to choose, you can purchase cheap pine boards at Lowes and Home Depot. You'll need to sand the bench after it's built. Then, finish it with varnish or a stain.
Is it possible to learn woodworking by yourself?
Learning by doing is the best way of learning anything. Woodworking is an art form that requires patience, practice, skill, and experience. Every craft takes practice and patience.
Learning how to do something is best done by doing it. Start small and use what you learn.
How long does a piece take to finish?
It depends on which wood you choose, how complicated your design is and what amount of finishing you apply. Hardwoods are more difficult to maintain than softwoods. Hardwoods can also be more costly than softwoods. They last longer and are more resistant to moisture. Finishing furniture can take anywhere from one week up to three months.
Statistics
- Average lumber prices rose about 600 percent between April 2020 and May 2021. (familyhandyman.com)
- Most woodworkers agree that lumber moisture needs to be under 10% for building furniture. (woodandshop.com)
- The U.S. Bureau of Labor Statistics (BLS) estimates that the number of jobs for woodworkers will decline by 4% between 2019 and 2029. (indeed.com)
- The best-paid 10 percent make $76,000, while the lowest-paid 10 percent make $34,000. (zippia.com)
External Links
How To
How to join two pieces of wood together without nails
Woodworking is an enjoyable hobby. It is relaxing and enjoyable because you can create something useful with wood. Sometimes you may want to join two pieces together of wood without using nails. This article will explain how to do this so that your woodwork projects stay beautiful.
Before joining the pieces of wood together, you will need to first trim any edges. Do not leave any sharp corners as they could cause problems down in the future. Once you've done this, you're ready to start gluing your boards together.
If you are working with hardwood, only one side should be glue. If you're using softwoods like pine or cedar, you should put glue on both sides. Apply the glue to the boards and press them down until they are securely attached. After applying the glue, let dry the boards before proceeding to the next stage.
After you've glued your boards, you'll want to drill holes into the joints where you plan to insert screws. The size of these holes depends on what type of screw you choose to use. For example, if your screw is a 1/2-inch wooden screw, drill a hole that is at minimum 3/4 inches deep.
Once you have drilled your holes you will need to drive the screws through each joint and into the backside. Be careful not to hit the front surface of the board, or else you'll ruin the finish. Be careful not to drive the screws too hard at the ends. This will help prevent splitting of the end grain.
Once your project is complete, it's time to protect it against the elements. You can seal the furniture pieces or cover the top. You'll want a product that lasts for many years. Some examples include oil-based varnishes, polyurethane, shellac, lacquer, etc.
These products are available at most home improvement stores. Just make sure that you buy the right kind for the job. Also, remember that some finishes are toxic and should never be used indoors. When handling certain finishes, wear protective gear.