Beginners should learn the basics of woodturning before they attempt more complicated projects. To start, beginners should turn a simple project such a handle for their hammer. You can also start small projects for beginners to learn the basics. But, more experienced woodworkers can take on more challenging projects after learning the basics. Listed below are some of the basic techniques and tools used in woodturning.
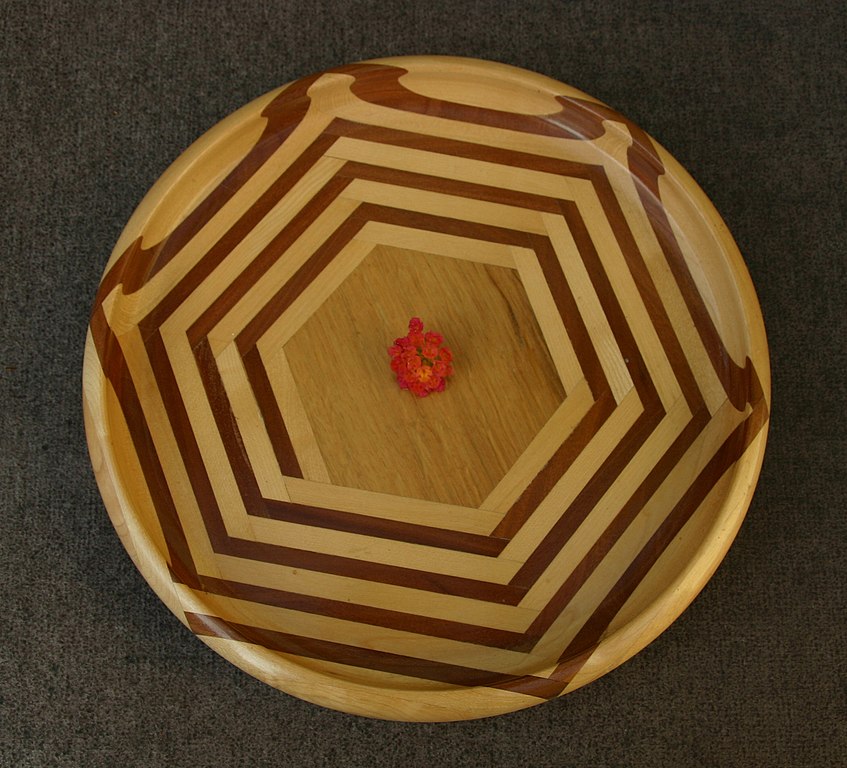
Turning spindles
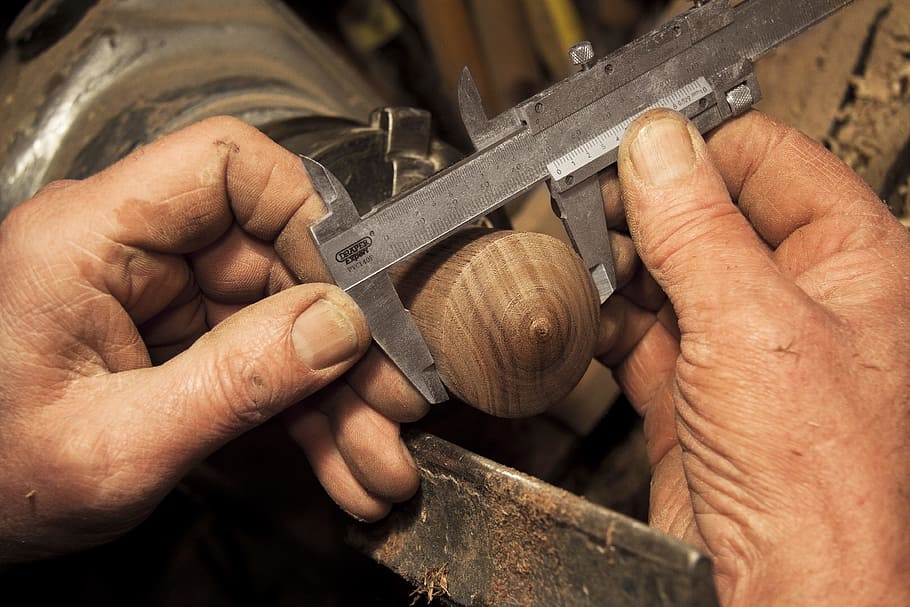
A square blank is the first step in creating a spindle. The blank should be mounted between the tailstock & headstock with a roughing knife. Once the blank is the right size, measure it with a caliper. Next, you will need to turn the spindle until it reaches the required diameter. You can measure each section with a caliper, and then place the tool rest in each groove until you have reached the desired diameter.
While woodturning is a fun and rewarding hobby, it is important to remember safety as you turn. Many techniques work well for spindle production, safe turning, and you can apply the knowledge to many different projects. Although this article doesn't address every aspect of woodturning safety it can be used as a starting point. Make sure to consult a professional for additional information on safety.
Working with softwood
Wood can be divided into two categories: hardwood and softwood. Hardwoods, such as maple, oak and hickory, are great for turning. Softwoods can be carved, however. For example, European yew is an excellent choice for making bows and musical instruments, while softwood is best for crafting furniture. Engineered woods like yellow pine are not suitable for turning.
Softwoods can retain their pitch pockets which can lead to problems in your finished work. This wood can leak pitch even after air-drying, so you must protect your clothes and other surfaces from being soiled with wood pitch. Pre-stain conditioner should be used before staining softwood. Pre-stain conditioning will penetrate the wood's open fibers and act as a barrier.
Speed limit for lathe

Most woodturners agree that the maximum lathe speed should be between 6,600 and 9,000 rpm for a given size. But there are several factors to consider, including the work piece's characteristics. The speed of a piece three inches in size should be 2,000 rpm. A work piece ten inches in diameter would require closer to 600 rpm. A limiting factor for lathe speed is the amount of vibration the work piece can withstand, so a lower RPM is best.
Choosing the right lathe speed should allow you to turn your blanks without vibration. If your workpiece is small, it may be easier to use a low speed setting. A higher speed setting will produce smoother work and vice versa. To find the correct speed for your woodturning project, experiment with different speeds to find out which works best. Smoother finishes are usually achieved with higher speeds.
Useful tools
Here is a list that includes some of your tools. A skew is a tool that has a beveled edge and is used to shape wood. This tool is able to cut long ribbons of wood out of a piece and is more efficient than other lathe tools for cutting end grain woods. The skew-chisel is also better at creating smooth, flat surfaces for turning bowls or spindles.
For woodturning, it is crucial to invest in quality tools. You shouldn't buy low-quality tools, as they can't hold an edges well. Also, high-speed stainless steel requires a sharpening tool. For a more efficient job, you'll need a grinder that has a good 8" diameter.
FAQ
How can I keep my shop organised?
Setting aside an area to store tools is the first step in keeping your workshop organized. Make sure your tools are clean and free of debris and dust so they can be used properly. You can hang tools and accessories with pegboard hooks.
What's the difference between a hobbyist and a professional woodworker?
Hobbyists enjoy creating things out of wood. Professionals tend to focus on the quality. Hobbyists tend to take pride and share their creations with family and friends. Professionals will spend hours researching designs and then begin to create a project. They will meticulously plan every detail of their work from choosing the right materials to finishing it.
How can a novice woodworker make it big?
Many people learn how to make furniture in order to set up an online business. You don't have to sell on Etsy if your furniture is just beginning. Sell at craft fairs or other local events. You could also offer workshops to help others learn how to make their own furniture. Consider offering your services if you have previous experience as a builder or carpenter.
Where do you start when it comes to woodworking?
Building furniture is the best way to learn how furniture is made. While you will need tools and make mistakes, you will eventually master the art of building furniture.
You should first choose the project you wish to complete. It can be something as simple and small as a box, or large-scale as an entertainment center. Once you have chosen a project, locate a local woodworker who is skilled in this kind of work. Ask him or her for advice on what tools you'll need and where to find them. You might even ask whether there's someone else you can talk to who does this kind of work.
Statistics
- In 2014, there were just over 237,000 jobs for all woodworkers, with other wood product manufacturing employing 23 percent; wood kitchen cabinets and countertop manufacturing employing 21 percent. (theartcareerproject.com)
- If your lumber isn't as dry as you would like when you purchase it (over 22% in Glen Huey's opinion…probably over 10-15% in my opinion), then it's a good idea to let it acclimate to your workshop for a couple of weeks. (woodandshop.com)
- The U.S. Bureau of Labor Statistics (BLS) estimates that the number of jobs for woodworkers will decline by 4% between 2019 and 2029. (indeed.com)
- Most woodworkers agree that lumber moisture needs to be under 10% for building furniture. (woodandshop.com)
External Links
How To
How to stain wooden surfaces
Staining wood is the process of applying chemicals to the wood's exterior, which alters its color. This chemical reaction changes the wood's color from white to brownish. Although oak is the most popular type of wood to stain, there are many other types that can be used.
There are many options for applying stains to wood surfaces. One method involves mixing the stain and a solvent and then spraying it on the wood. Some methods involve a mixture of water and dye that is applied directly to the wood. Stains can also be mixed into paints and varnishes, becoming part of the finish coating.
The first step in staining wood is preparing the surface. Cleaning the wood thoroughly removes any dirt or grease that could interfere with applying the stain. Sanding smoothens any scratches or rough spots. You must then decide on the type of stain that you wish to use. Penetrating stains are different from non-penetrating. Penetrating and non-penetrating wood stains penetrate deeper than other types, making them perfect for dark colors like mahogany. Light colors such as maple work well with non-penetrating stain.
After you've decided what type of stain to apply, get ready for your tools. Paintbrushes are great for applying stain because they allow you to evenly spread the liquid across the surface. You should also have some handy rags to wipe up excess stains after you finish painting. If you plan on mixing the stain yourself make sure that you have enough containers to hold the different components.
After you have prepared your materials for staining, clean the area. To remove dirt and dust, use warm water and soap. Wipe the entire piece of furniture with a rag dampened with clean water. If you intend to stain darker wood, make sure you get rid of any debris.
Next, spray the stain. Begin at one end and spray or brush the stain on the wood. Work slowly and carefully, moving back and forth along the grain of the wood until you reach the opposite end. Make sure that the stain does not drip off the edge of the wood. Allow the stain to dry completely before you move on to the next step.
Apply a clear polyurethane sealant to protect the painted surface. Apply three coats with polyurethane. Allow the third coat of polyurethane sealer to dry overnight before applying the final coat.