
You need a few tools to add texture and dimension to your furniture. The most widely used tool is the nail set. This is used to set nails. However, it can also be used to create small dimples on wood. A chisel, on the other hand, was created for paring small surfaces. A chisel can be used for creating uneven, slightly faceted surfaces. Whatever tool you use to create stunning surfaces, be sure to keep an eye out for unique textures.
Substance Designer
You've found the right place if you are looking for a node-based tool to texturize. Substance Designer allows you create Substance textures, Substance files, or procedural effects with ease. Substance Designer includes GPU-accelerated baking, a new noise generator, and hundreds of revised editing tools. It is loved by game developers and 3D artists alike.
The software is easily integrated into existing work environments. Substance Designer is packed with many features. However, it was designed to be integrated into your current workflow. There are no release notes for this application, but the latest version was released last year. Substance Designer could be worth your time if 3D texturing is new to you. A free trial version of Substance Designer is available to give you an idea of how the program works.
Material Baker 2
Material Baker 2 lets you create the most realistic textures possible for your game assets. You can also bake the texture into one or more vertices. The baked color will replace the original material. Baked textures have a different resolution and sampling quality depending on how many vertices you have and the size of your mapping image. The Material Baker 2 is compatible with all major game engines. The Material Baker 2 guide manual provides additional information.

The Bake Section lists all materials that were assigned to selected mesh objects. The Bake Section lets you select a particular material to view the assigned objects. This tool requires knowledge of materials and shaders. This baked image will then be placed in the Material as a separate unconnected Texture node, directly underneath the principled BSDF shader. The baking workflow is unchanged. The new baker also has new tools for fixing textures that are too thick or too thin.
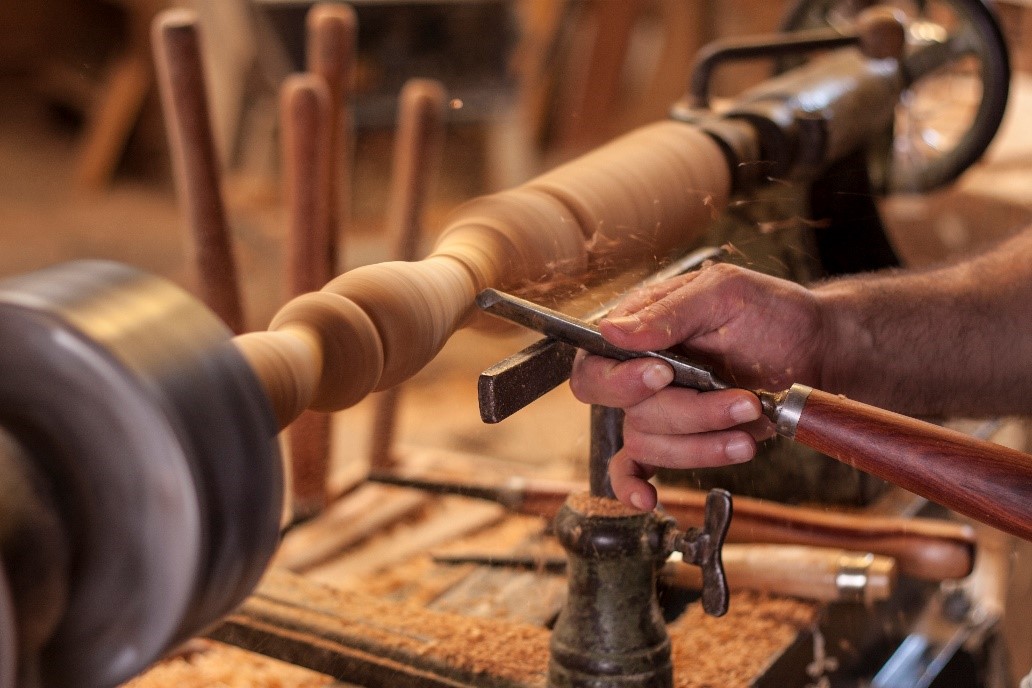
Robert Sorby Texturing Tool
Robert Sorby's Texturing Tool is an excellent tool for woodworkers. It produces a wide variety of textures on flat and end grain. These textures can be very different in texture, from soft and tactile to hard and dramatic. This versatile tool can be sharpened with the included diamond hone and comes complete with instructions. It is perfect for woodworking projects that are large and complex. It is available in two sizes, the micro-sized and the large.
The 310H has an interchangeable cutter handle and spindle. It allows you to alter the tactile and visual qualities of your work and add a unique touch to it. It can also be used for woodturning projects. It is versatile enough to be used on both hard and softwoods. You can choose to have it mounted on a handle or stand alone. Additionally, you can add spiralling cutters and tool rests.
Mari 3D Paint Tool
The Mari 3D paint tool supports UDIM workflows and a wide range of textures and materials. The extensive Python API makes it easy for technical artists to automate workflows, and integrate it into their own pipelines. The Materials System is a comprehensive tool that allows rapid creation and distribution of high-volume assets. Mari's easy-to-use and robust features make it a great choice for beginners. In this article we will look at the 3D painting benefits of Mari.
Mari was created originally by Weta Digital. This visual effects company developed the tool. The software was made specifically for Avatar's needs. It created high resolution textures on complicated models and is responsive to all sizes. It paints textures within scenes and animations, not on individual objects. Its simplicity makes it ideal for all types of 3D painting projects from demo reels to movies.
Autodesk Mudbox
Mudbox texture can enhance the quality of your model. Autodesk Mudbox texturing software is easy to use and offers powerful options. Import meshes made with scan and/or sculpt data. This software can bake displacement and normal texture. The software also includes dynamic tessellation systems and ambient occlusion maps. The program even links with Autodesk Flame for linking data.
Mudbox is capable to handle many mesh models. Quad meshes with clean sub-divisions are supported by Mudbox, which greatly simplifies your workflow. The program comes with UV coordinates. These coordinates can be used to paint 3D objects as well as attach texture maps. If you are working on a complex model of polygons, it is important to unwrap the vertexes and make texturing possible.
FAQ
Where do you start when it comes to woodworking?
The best way to learn how to build furniture is by building furniture. While you will need tools and make mistakes, you will eventually master the art of building furniture.
You should first choose the project you wish to complete. It can be something as simple and small as a box, or large-scale as an entertainment center. Once you have chosen a project, locate a local woodworker who is skilled in this kind of work. Ask them for their advice about the tools and where they can be found. Ask if you can find someone who does this kind work.
What tools should I start with when becoming a woodworker?
Woodworking is an art that takes patience and practice. It takes time and practice to master the various techniques and tools required for woodworking.
There are many woodworking tools on the current market. Some prefer to use power tools, while others prefer to use hand tools.
The choice is yours, but you must ensure you choose the right tool for the job. Start with a basic set if you don’t have any previous experience.
A router is a tool that cuts intricate shapes in wood. You can also learn how to use it. These tools can be purchased at most hardware stores.
Do you have any suggestions for starting a woodworking shop?
Starting a woodworking business is a lot of work. But if you're passionate about your hobby, you won't mind putting in the effort. You'll enjoy the challenge and rewards of owning your own business.
It is important to remember that unexpected problems may arise when you start a new venture. Unexpectedly, money might run out. Perhaps customers won't pay you as much as you had hoped. Preparedness is key to survival in such situations.
Set up a separate account in your bank for your business. You'll be able to track how much money comes in and out.
Statistics
- Average lumber prices rose about 600 percent between April 2020 and May 2021. (familyhandyman.com)
- If your lumber isn't as dry as you would like when you purchase it (over 22% in Glen Huey's opinion…probably over 10-15% in my opinion), then it's a good idea to let it acclimate to your workshop for a couple of weeks. (woodandshop.com)
- Most woodworkers agree that lumber moisture needs to be under 10% for building furniture. (woodandshop.com)
- In 2014, there were just over 237,000 jobs for all woodworkers, with other wood product manufacturing employing 23 percent; wood kitchen cabinets and countertop manufacturing employing 21 percent. (theartcareerproject.com)
External Links
How To
How to stain wooden surfaces
Staining wood refers to applying chemicals to wood's surface. This chemical reaction causes the wood to change in color. The wood will turn from white to brownish-red due to the chemical reaction. Oak is the most commonly used wood for staining, but other woods can also be stained.
There are many ways to stain wood surfaces. Mixing the stain in a solvent such as turpentine and spraying it onto the wood is one method. Other methods use a solution of water and dye applied directly to the wood. You can mix stains into varnishes or paints to make them part of your finish coat.
The first step in staining wood is preparing the surface. Clean the wood to get rid of any grease, dirt or other substances that might be detrimental to the stain's application. Sanding smoothens any scratches or rough spots. The next step is to determine the type of stain you would like to use. Penetrating stains are different from non-penetrating. Penetrating stain penetrates deeper into wood than nonpenetrating, making them suitable for dark colors like mahogany. Penetrating stains are best paired with lighter colors, such as maple.
Once you have decided on the stain type that you want, get your tools ready. Paintbrushes are great for applying stain because they allow you to evenly spread the liquid across the surface. You should also have some handy rags to wipe up excess stains after you finish painting. If you plan to mix the stain yourself, make sure you have enough containers available to hold the different components of the mixture.
After you have prepared the materials, you can clean the area where you want to stain the wood. Use soap and warm water to remove dust and grime. Use a dampened rag and clean water to wipe the furniture. If you intend to stain darker wood, make sure you get rid of any debris.
Apply the stain. The stain can be applied by spraying or brushing the stain onto one end of the furniture. Work slowly and carefully, moving back and forth along the grain of the wood until you reach the opposite end. The stain should not drip off of the wood's edge. Allow the stain to dry completely before you move on to the next step.
Clear polyurethane is used to protect the painted surfaces. Apply three coats of polyurethane sealer. Allow the third coat to dry overnight, before sanding.